The application scenarios of dark surfaces
Dark surfaces offer unique application scenarios for UV printer. Here are some common examples:
1. Customized Apparel: Dark-colored clothing, such as black t-shirts or hoodies, provide a great canvas for UV printing. You can print vibrant and detailed designs, logos, or artworks directly onto the fabric, creating personalized and eye-catching garments.
2. Promotional Items: Dark surfaces, like metal or plastic pens, keychains, or phone cases, can be printed with UV technology to add branding elements, company logos, or personalized messages. This allows for customization and enhances the visual appeal of promotional products.
3. Signage and Displays: Dark-colored signboards, acrylic panels, or banners can be printed with UV ink to create visually striking advertising materials. The UV ink stands out vividly against the dark background and ensures excellent color saturation and durability.
4. Home Decor: Dark surfaces in home decor, such as wooden or glass frames, ceramic tiles, or decorative items, provide opportunities for UV printing. You can add intricate patterns, images, or personalized designs to enhance the aesthetics and uniqueness of these objects.
5. Automotive Accessories: Dark surfaces in automotive accessories, like car dashboards, interior panels, or motorcycle helmets, can be customized with UV printing. This allows for branding, adding logos, or creating detailed designs that complement the overall style of the vehicle.
These are just a few examples, and the possibilities are endless. UV printing on dark surfaces enables creativity and the ability to add personalization or branding to a wide range of products and materials.
How to print on dark surfaces with a WER UV printer
Printing on dark surfaces with a WER UV printer requires a slightly different approach compared to printing on light surfaces. Here’s a step-by-step guide to help you achieve excellent results:
1. Prepare the artwork: Make sure your design includes a white layer beneath the colors or images you want to print. This white layer acts as a base to enhance the visibility and vibrancy of the colors on dark surfaces.
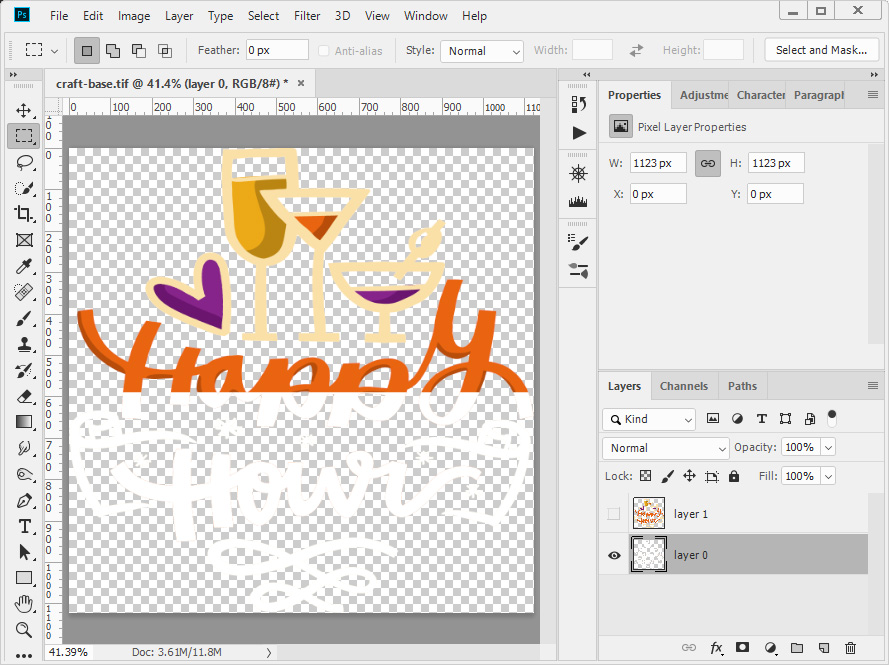
2. Set up the printer: Adjust the printer settings to accommodate the dark surface. Increase the white ink opacity to ensure proper coverage and use the appropriate curing settings for optimal adhesion.
3. Test and calibrate: Before printing on the actual dark surface, conduct test prints on a similar material to fine-tune the color settings, ink density, and curing time. This will help you achieve the desired outcome and avoid any potential issues.
4. Print with precision: Load the dark surface onto the printer’s flatbed or roll-to-roll mechanism, ensuring it is securely positioned. Send the print job to the printer, making sure the white layer is printed first. Follow the printer’s instructions for proper printing and curing.
5. Post-process and inspect: Once the printing is complete, carefully remove the printed dark surface from the printer and allow it to cure fully. Inspect the print for any imperfections or areas that may require touch-ups.
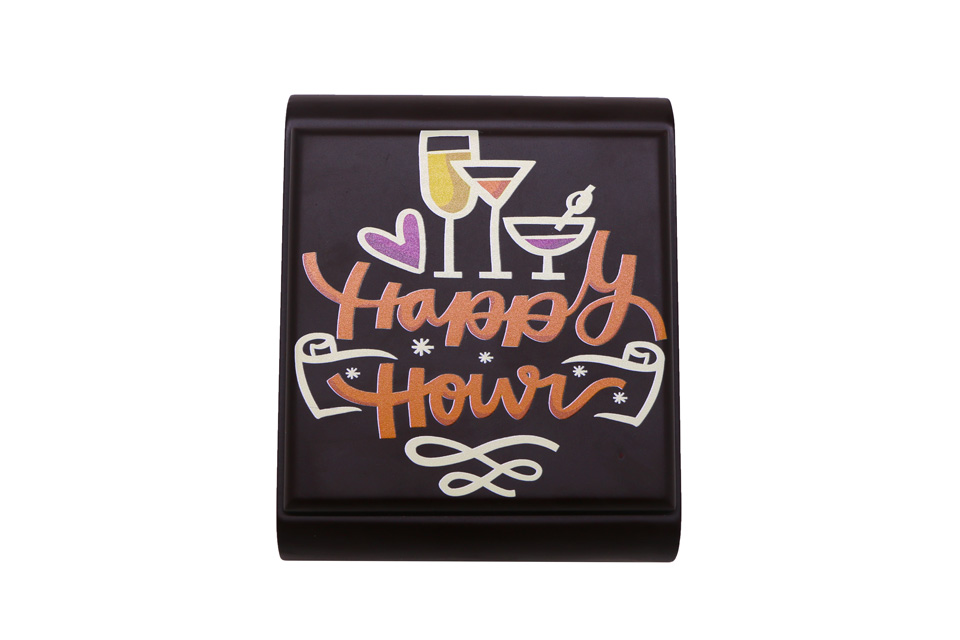
Below is a video of the WER A3 E3055UV printer printing patterns on a dark wooden Craft Base:
Remember, it’s crucial to follow the manufacturer’s instructions and guidelines specific to your WER UV printer model for the best results. With practice and experimentation, you’ll master printing on dark surfaces and unleash your creativity.
Recent Comments