1.Routine maintenance steps
The first step of routine maintenance: first use cleaning fluid to clean the surface of the UV printer nozzle and the residual ink and dust in the nozzle to prevent the curing ink from filling the nozzle hole when wiping the nozzle after curing, causing blockage.
The second step of routine maintenance: Print the nozzle test status bar to check the status of each nozzle, confirm that the nozzle status is OK, and start printing!
The third step of daily maintenance: during the printing process, avoid someone with a color nozzle that does not emit ink continuously. If printing a single color continuously, it is recommended to add a 6-color printing color bar to prevent continuous ink failure or rivets caused by ink curing. .
The fourth step of routine maintenance: Print the nozzle test status bar when off work to check the status of each nozzle, confirm that the nozzle status is OK, and shut down. It does not need to be moisturized with cleaning liquid.
The fifth step of daily maintenance: turn off the equipment to avoid direct sunlight and ultraviolet rays to protect the equipment and the spraying area from dust. It is recommended to put a dust cover to protect the nozzle.
Note: After using the cleaning fluid, tighten the cleaning fluid to prevent the internal decay of the cleaning fluid, which will cause the cleaning fluid to deteriorate. Generally, the opened cleaning fluid should be used up within one month.
2.Maintenance during printing and in standby mode
1: Clean up the dirt and dust on the printing platform area and the surface of the printing medium before printing to prevent static electricity from adsorbing the dust on the surface of the nozzle and mixing with the residual ink during the printing process to solidify and seal the nozzle hole.
2: During the printing process, a special cleaning fluid should be used to clean the residual ink on the surface of the nozzle every 2 hours.
3: In the printing process, avoid someone with one color nozzle continuously not emitting ink. If continuous printing in single color, it is recommended to add a 6-color printing color bar to prevent continuous non-inking nozzle ink solidification caused by ink curing.
4: The flash spray function needs to be turned on for short-time standby: it is recommended that the flash spray frequency should not be less than 4Hz
5: At the end of daily printing, it is necessary to clean the residual ink on the surface of the nozzle and around the nozzle, apply UV cleaning liquid to moisturize, and put on the dust cover.
3.Maintenance of the ink path and nozzle of the UV flatbed printer without using the printer for a long time
1: When the printer is parked (5-10 days), the ink inside the nozzle needs to be compressed, cleaned with a special UV cleaning liquid, and then injected into the cleaning liquid humidity. Then take measures to prevent ultraviolet rays and dust from the equipment
2: When the printer is parked (10-15 days), the entire ink needs to be compressed from the main ink bottle to the nozzle, cleaned with a special UV cleaning liquid, and then filled with the cleaning liquid humidity. Then take measures to prevent ultraviolet rays and dust from the equipment.
3: After the printer is cleaned and parked (more than half a month), check the nozzles for dryness and dust prevention every 5 days. If the moisturizing fluid is dry and volatile and dusty, please promptly humidify the fluid and clean the dust.
4.The reason why UV printers usually encounter blockage or damage to the nozzle
1: Use ink and cleaning fluid that are not certified by the SPT print head factory.
2: Use expired or deteriorated UV ink.
3: The surface of the printing medium is reflective and solidified the ink remaining on the surface of the nozzle, which can not be found and cleaned in time.
4: During the printing process, the surface of the nozzle is scratched against the printing medium, causing damage to the nozzle surface and nozzle holes.
5: Use contaminated cleaning fluid to rinse the nozzle.
6: The nozzle and ink path are irradiated by strong sunlight.
7: The nozzle and the second-level ink cartridge heating system is out of control, and the temperature continues to rise, and the temperature cannot be detected and handled in time.
8: Plug and unplug the print head flat wire and print head circuit board with power on.
5.How to deal with the blockage caused by the contamination of the ink path and the nozzle
Step 1: remove the nozzle and clean the entire ink system with a special UV cleaning fluid. If you find crystalline and solid ink in the pipeline, please replace the ink tube and ink filter in time.
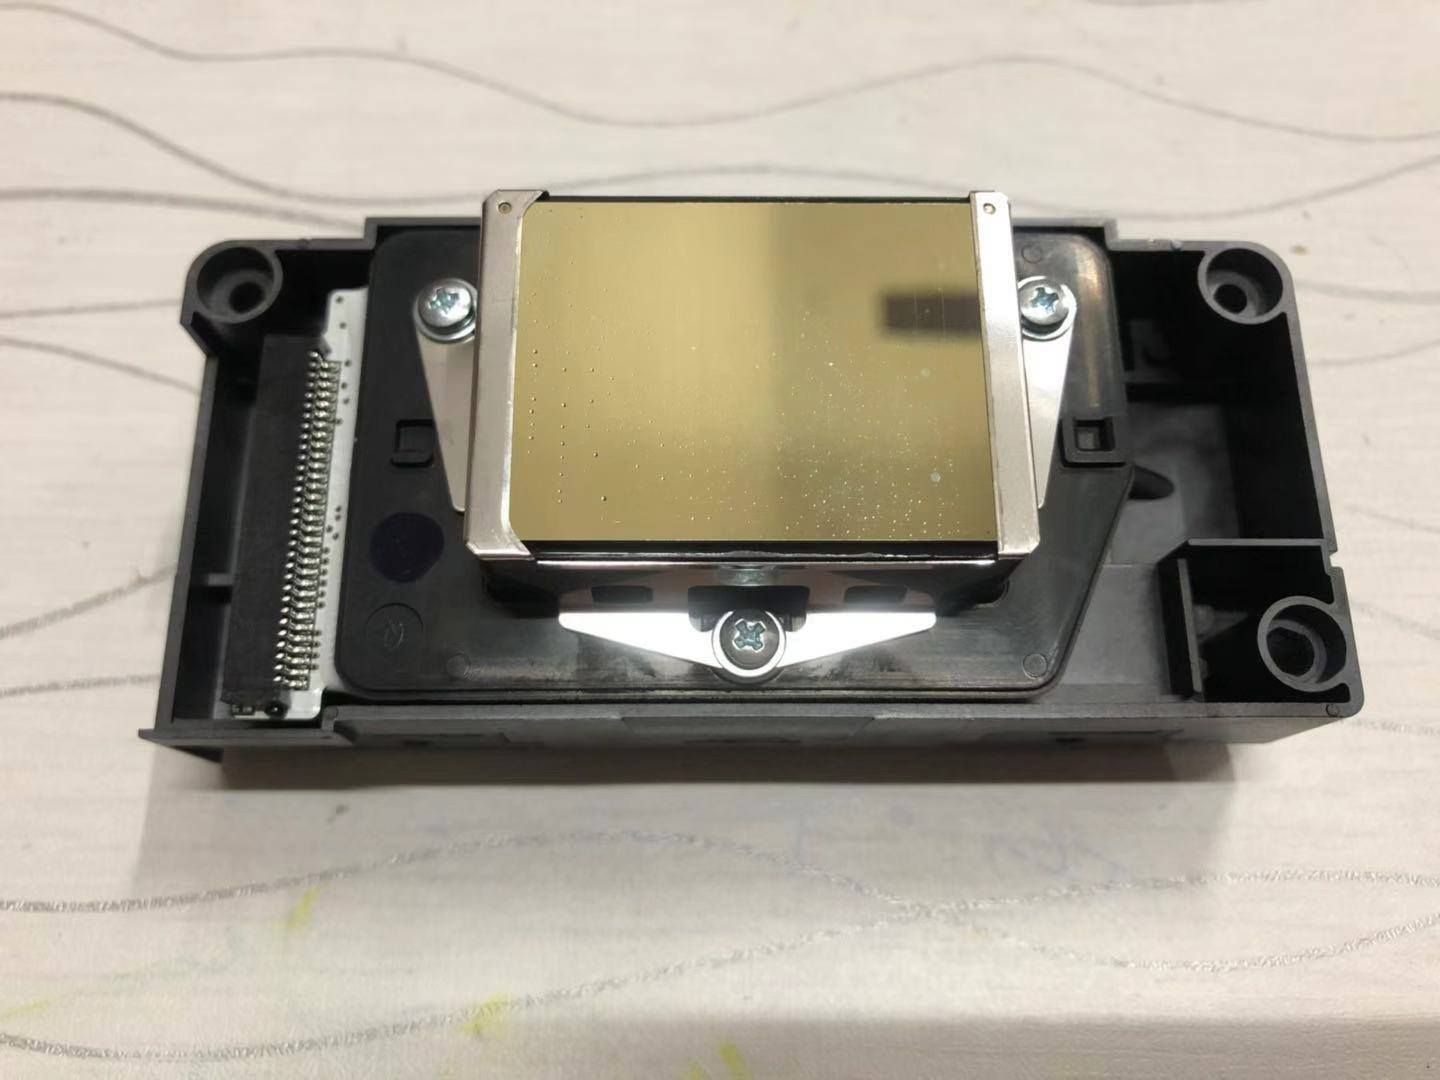
Step 2: Clean up the ink on the surface of the print head. Be careful not to let the cleaning fluid and ink enter the circuit board of the print head.
Step 3: Prepare the following items 1: UV cleaning solution; 2: cleaning tube interface; 3: glass syringe; 4: cleaning tray; 5: non-woven fabric; 6: cotton swab
Step 4: Clean up the residual ink and dirt on the surface of the nozzle.
Step 5: Lay a clean non-woven fabric on the bottom of the cleaning tray, pour in clean cleaning liquid, put it into the nozzle, draw the cleaning liquid back from the tray to the syringe, pull out the syringe, press the cleaning liquid, and repeat 5 -10 reverse pumping, and finally use the syringe for repeated positive pressure cleaning.
Precautions:
1: Reverse pumping and positive pressure should not be too high, the first cleaning action must be reverse pumping.
2: Make sure that the tray and cleaning fluid are absolutely clean before performing the above operations, otherwise the injection hole insertion will be aggravated.
6.The oblique spray treatment method caused by the curing of the ink on the surface of the nozzle
Use a cotton swab (UV cleaning fluid) to replace and wipe the solid UV ink on the surface of the print head, and then use the syringe to repeatedly positively press the UV cleaning fluid to clean the print head.